
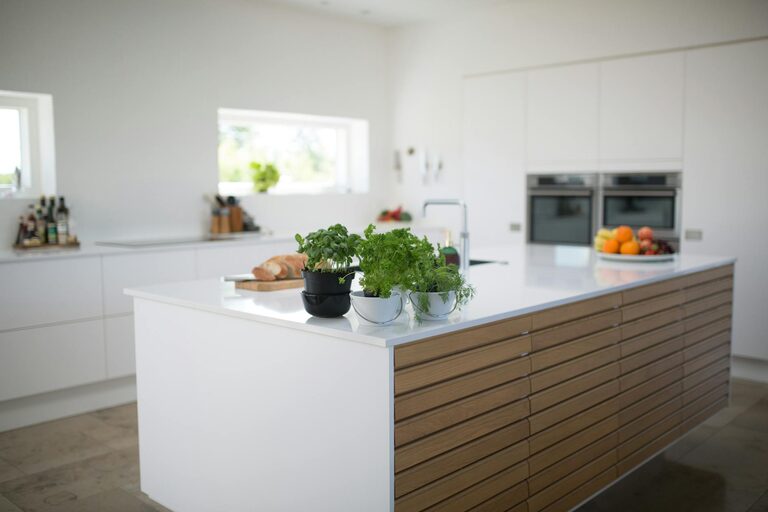
Keeping your kitchen counters clutter-free can transform your cooking space from chaotic to calm. A clean workspace not only looks inviting but also makes meal prep easier and more efficient. If you’ve been struggling with countertop clutter, don’t worry — with a few simple steps, you can create a kitchen environment that is organized, tidy, and stress-free.
In this post, we’ll explore practical ways to reduce clutter and maintain a neat kitchen counter every day.
Why Keep Kitchen Counters Clutter-Free?
Before diving into how to declutter, it’s helpful to understand the benefits:
– Enhances functionality: More clear space means easier access to what you need.
– Improves safety: Less clutter reduces the risk of spills or accidents.
– Elevates aesthetics: A tidy counter instantly makes your kitchen look cleaner and larger.
– Encourages cleanliness: Fewer items mean easier cleaning and fewer hiding spots for dirt or germs.
Step 1: Clear Everything Off and Start Fresh
To effectively organize your counters, begin with a blank slate.
– Remove all items from the countertop.
– Give the counters a thorough clean using your preferred kitchen surface cleaner.
– Sort the items you removed into categories (daily essentials, occasional use, rarely used, trash/donate).
This initial step helps you clearly see how much space you have and evaluate what you’re really keeping on the counters.
Step 2: Decide What Belongs on the Counter
Not everything needs a spot on your kitchen counters. Ask yourself:
– Do I use this item every day?
– Is this item bulky or hard to store elsewhere?
– Does it enhance the kitchen space aesthetically or functionally?
Items such as a coffee maker, frequently used knives, or a paper towel holder may be justified on the counter. Less often used appliances — like a blender or toaster oven — can usually be stored in cabinets or pantry areas.
Items Best Stored Elsewhere
– Cooking utensils (can go in drawers)
– Small appliances not used daily
– Spice racks (consider a spice drawer or cabinet shelf)
– Food storage containers
Step 3: Use Smart Storage Solutions
Countertop clutter often happens when items don’t have a proper home. To fix this, introduce storage solutions that keep things organized but accessible.
Consider These Options:
– Wall-mounted shelves or racks: Free up counter space by storing frequently used items on walls.
– Magnetic knife strips: Keep knives handy but off the counter.
– Under-cabinet hooks: Hang mugs, utensils, or small pots.
– Countertop organizers: Use trays, baskets, or tiered stands to group items like oils, spices, or coffee supplies neatly.
– Drawer dividers: Help keep utensils and tools sorted out of sight.
Step 4: Create Zones for Efficiency
Organize your countertop according to task zones for cooking, prepping, and cleaning.
– Place cooking tools and ingredients near the stove.
– Keep cutting boards, knives, and mixing bowls in a prepping area.
– Store cleaning supplies close to the sink or dishwasher.
Having designated zones avoids mixing too many items together and keeps the counter purposeful.
Step 5: Adopt Daily Habits to Maintain Clarity
A clutter-free counter relies on consistent habits.
– Put items back: Return tools and appliances to their designated storage after use.
– Clean as you go: Wipe down counters daily to prevent buildup.
– Limit counter-only items: Avoid piling up mail, shopping bags, or random household items.
– Set a weekly reset: Dedicate a few minutes each week to re-organize and clean.
Bonus Tips for a Clutter-Free Kitchen
– Use decorative containers: Attractive jars or canisters can store staples like flour or sugar while adding charm.
– Minimal decor: Limit decorative items to one or two elegant pieces rather than crowding the space.
– Consider countertop materials: Smooth surfaces like quartz or granite are easier to clean and discourage clutter.
Conclusion
Transforming your kitchen counters into clutter-free, organized spaces is easier than it seems. By clearing everything off, evaluating what you actually need on hand, investing in smart storage, creating workable zones, and developing daily habits, you’ll enjoy a kitchen that’s both functional and inviting.
Take it one step at a time, and soon your counters will be a joy to use and look at every day. Happy organizing!